买了几个15b+,直流电压与287对比低了10几mv,不知道怎么调准。找售后发给我校准说明,是英文看不太懂,哪位大师帮忙看看有中文版没,谢谢!
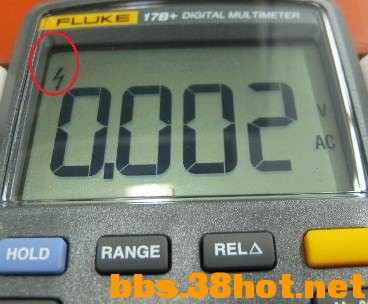
Aerking15B+&17B+ calibration notes Front Panel Operationfor Adjustment Take off battery doorand battery, battery contact spring connect to 3V dc power supply. Use smallprobe to press the calibration button to enter the Meter’s calibration, turnRSOB to select the function to be calibrated, set calibrator output the desiredsignal stably, after wait 4 seconds then press hold button to confirm andforward next step RequiredEquipment Enter calibration mode 1. Take off battery door and battery, batteryspring connect to 3V power supply; 2. Turn RSOB to select the function to becalibrated; 3. Short circuit ‘CAL1’ and ‘WP6’ pad on PCB bottomonce;
4. UUT signal input terminal connect tocalibrator (F5522A or other) output terminal; 5. Input calibration values after enter cal.mode; 6. Press HOLD button to calibrate each valueat all functions; 7. For 17B+ temperature calibration, need manualadjust potentiometer; 8. Turn off the unit after calibration allfunctions. LCD display pictures afterentering every function VAC function, High voltagemark flicker VDC function
 ,High voltage mark flicker
 file:///C:/DOCUME~1/qa13/LOCALS~1/Temp/msohtml1/03/clip_image004.jpg Capfunction, High voltage mark flicker file:///C:/DOCUME~1/qa13/LOCALS~1/Temp/msohtml1/03/clip_image005.jpg ADC function,High voltage mark flicker file:///C:/DOCUME~1/qa13/LOCALS~1/Temp/msohtml1/03/clip_image006.jpg mADCfunction, High voltage mark flicker file:///C:/DOCUME~1/qa13/LOCALS~1/Temp/msohtml1/03/clip_image007.jpg Temperature function (17B+),need manual adjust potentiometer file:///C:/DOCUME~1/qa13/LOCALS~1/Temp/msohtml1/03/clip_image008.jpg
|